
The Best Light for Kealakekua Bay Snorkeling Photos
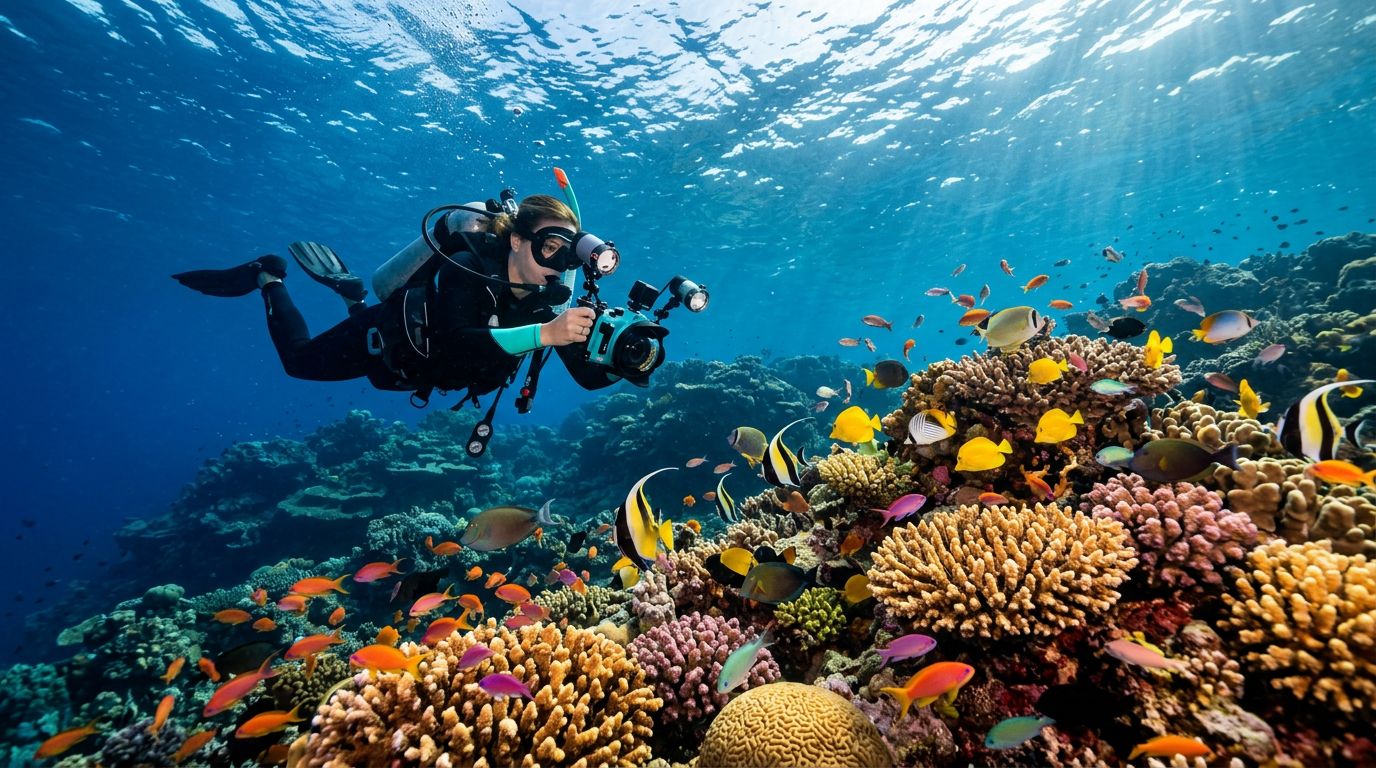
The best light for Kealakekua Bay snorkeling photos is usually a mix of sunlight and an external strobe. Natural light gives you the wide, bright look of the bay, while a strobe restores color to coral, fish, and skin tones beneath the surface.
A strong light alone won’t create great images. You also need the right beam, camera settings, distance, and approach to marine life. Once you understand how water changes light, your underwater photos will look clearer and more colorful.
Why underwater light matters in Kealakekua Bay
Sunlight can look intense above the surface, yet underwater colors fade quickly. Water absorbs light as you descend, and red tones disappear first. Orange and yellow follow, leaving many underwater scenes with blue or green color.
That shift is easy to miss while you’re swimming. Your eyes adjust to the surroundings, but your camera records the available light without making the same correction. A bright orange fish may appear gray, and pink coral may look violet or blue.
The effect becomes stronger when you shoot through several feet of water between the camera and your subject. Even in clear conditions, every extra foot adds more water between your lens and the color you want to capture.
NOAA’s overview of how light travels through the ocean gives useful background on why underwater scenes lose brightness and color so quickly.
Kealakekua Bay often gives you excellent visibility near the surface, which makes natural-light photography possible. However, shadows under ledges, darker reef sections, and fish facing away from the sun still benefit from added light.
Your distance matters as much as your equipment. Water scatters light, so moving one foot closer often improves a photo more than increasing your camera’s power. Stay close without crowding the animal, and keep the water between your lens and subject to a minimum.
Natural light changes throughout the swim
Morning conditions may offer softer surface glare, while bright midday sun can create stronger color and contrast. Clouds reduce the amount of available light, but they can also soften reflections on the surface.
Surface chop affects photos too. Waves create moving patterns of light that can brighten one frame and darken the next. If you shoot in shallow water, wait for a calm moment before pressing the shutter.
Your position relative to the sun also matters. With the sun behind you, your subject receives more direct light. Shooting toward the sun can create attractive silhouettes and sunbursts, but it usually produces darker reef colors.
The best underwater light depends on your camera
Still photography and video need different lighting tools. A compact camera, action camera, and interchangeable-lens housing each handle underwater light in their own way.
For most still photos, an external strobe gives the strongest improvement. A strobe produces a short, powerful burst that freezes movement and restores color close to the camera. You can angle it away from the lens to reduce backscatter from sand and plankton.
For video, a continuous underwater video light is easier to use. It lets you see the lighting effect while you frame the shot. Continuous light also works well for action cameras, which can record moving subjects without waiting for a flash.
Built-in camera flashes are less useful underwater. They sit close to the lens, so they illuminate particles directly in front of the camera. That creates bright white dots across the frame, especially when the water contains suspended sand or plankton.
Choose a strobe for colorful still images
An external strobe is the best choice when you want sharp photos of fish, reef texture, or people snorkeling near the monument. Look for a model with adjustable power, a wide beam, and a fiber-optic trigger if your housing supports one.
Mount the strobe on an arm rather than directly beside the housing. Position it slightly above and to the side, then aim the beam across the front of the subject. This keeps reflected particles out of the direct path between the light and your lens.
Start with low or medium power in shallow water. You can raise the output when your subject is farther away or when clouds reduce the available light. A strobe positioned too close or set too high can create harsh highlights on pale coral and faces.
Use two strobes when you need even lighting across a wider scene. One strobe is often easier for a snorkeling trip because it keeps your setup smaller and simpler. A single light also leaves one hand free for stability or safe camera handling.
Choose a video light for moving footage
A video light needs a broad beam and enough output to cover your frame. Narrow beams can create a bright center with dark corners, especially when you film a group of swimmers or a wide coral scene.
Look for a light with adjustable brightness and a secure mounting system. A cold shoe mount or tray handle makes it easier to keep the light pointed where your camera is facing. A wrist lanyard adds security when you need to release the camera.
For video, color quality matters. A light with a high color-rendering rating can produce more natural coral and skin tones than a cheap light with a harsh blue cast. Adjustable color temperature is helpful, but it isn’t essential for casual snorkeling footage.
Keep the light close to the camera while filming wide scenes. Move it farther to the side for close-ups if your setup allows. The goal is to light the subject without creating a bright reflection on the water or a large hotspot on the reef.
When sunlight is enough
You may not need an artificial light at all when you’re photographing in shallow, clear water under bright sun. Natural light works well for turtles, schools of fish, swimmers, and broad reef scenes.
A light can even make certain photos worse if you use it at the wrong distance. A powerful strobe may produce a bright foreground while the background turns dark. For a wide scene, lower the power or turn the strobe off and expose for the water and reef.
Use natural light when you want the scene to feel open and atmospheric. Add artificial light when the subject is close, colorful, shaded, or facing away from the sun.
Light specifications that matter underwater
You don’t need the largest or most expensive light for a Kealakekua Bay snorkeling trip. You need equipment that matches your camera, shooting distance, and comfort in the water.
| Light feature | What to look for | Why it matters |
|---|---|---|
| Beam angle | Wide beam for video, adjustable beam for stills | Covers your subject without harsh hotspots |
| Brightness control | Several power levels | Helps you balance sunlight and artificial light |
| Color quality | Natural-looking, high color rendering | Keeps coral and skin tones believable |
| Battery system | Rechargeable battery with a clear indicator | Reduces uncertainty during a long swim |
| Mounting | Tray, arm, or secure cold shoe mount | Keeps the light pointed at your subject |
| Safety feature | Lockout or protected controls | Prevents accidental activation in transit |
A wide beam is usually more useful than extreme brightness for snorkeling video. A narrow, powerful beam may work for close subjects, but it can leave the edges of your frame underexposed.
Battery life deserves attention. Bright settings drain batteries quickly, especially when you film continuously. Charge the light before leaving your hotel, and carry spare batteries only if the manufacturer allows them in your setup.
Controls should be easy to operate by touch. You may wear a mask, deal with surface movement, and hold a camera at arm’s length. Small buttons that are hard to find can slow you down or make you miss a moment.
Size also affects your swimming. A large light with long arms adds drag and can make it harder to maintain good body position. For a family or casual photographer, a compact light often provides a better overall experience than a professional rig.
Camera settings for Kealakekua Bay photos
Start with a simple setup, then adjust based on the light and subject. Your exact settings depend on the camera, housing, lens, and whether you’re shooting stills or video.
For still photos in bright shallow water, try:
- ISO 100 to 400
- Shutter speed around 1/250 second or faster for moving fish
- Aperture around f/5.6 to f/8 when your camera allows manual control
- Auto white balance when using a strobe
- RAW capture when available
These are starting points, not fixed rules. If your photos look dark, open the aperture, raise ISO, or add light. If the background loses its blue color, lower the shutter speed or adjust exposure so the water remains visible.
When you use a strobe, expose the background with the camera and expose the subject with the flash. This gives you control over both parts of the image. A faster shutter can darken the blue water, while strobe power controls the nearby fish or reef.
For video at 30 frames per second, many photographers begin near a 1/60-second shutter speed. At 60 frames per second, 1/120 second is a common starting point. Keep your movements slow because rapid camera motion can make underwater footage look unstable.
White balance becomes more important when you use continuous light. Set it according to your light’s instructions, or use a custom setting if your camera supports one. If you swim into a shaded area, check the color again before recording a new clip.
Focus and composition matter more than extra power
Get close, then get a little closer if the animal allows it. Your lens will produce sharper color and contrast through two feet of water than through ten feet.
Keep the camera level with the subject whenever possible. Shooting down at the reef can make the scene look flat and can place distracting surface reflections behind the subject. A lower angle often gives fish a cleaner background.
Leave space in front of a moving fish. If the animal swims toward the right, place it slightly left of center so the frame has room for its movement.
For people, focus on clear body position and separation from the background. Ask swimmers to move slowly and avoid kicking directly over the reef. A calm subject gives you cleaner photos and reduces suspended sand.
Shoot several frames when the light and subject align. Fish change direction quickly, and surface movement can alter exposure from one moment to the next. Burst mode helps, but don’t rely on it for every scene.
Use artificial light without disturbing the reef
Your light should improve the photo without changing the animal’s behavior. Avoid shining a bright beam directly into a fish’s eyes, especially when the animal is resting under a ledge or in a shaded area.
Keep your body away from coral. Even a small fin touch can break fragile branches or damage the surface of a living colony. Maintain neutral buoyancy, stay aware of your fins, and use the water around you for balance rather than the reef.
Never chase wildlife for a better angle. If a turtle, fish, or ray moves away, give it space. A strong photo is not worth causing stress or blocking another swimmer’s view.
Your camera and light should have secure wrist straps or mounts. Loose equipment can sink onto the reef, create a hazard, or distract you while you’re trying to retrieve it. Check every connection before entering the water.
Use reef-safe sunscreen as requested by your tour operator, and apply it before you arrive at the water. A rash guard, hat, and shade during surface intervals can reduce how much sunscreen you need.
Coral reefs are living communities, not underwater scenery. NOAA’s coral reef education resources explain how coral animals build the structures that support so much marine life.
The best underwater light is the one you can control without losing awareness of your body, your buddy, or the reef below you.
Make your Kealakekua Bay snorkeling setup easy
A complicated camera rig can distract you from the experience. If you spend the entire swim adjusting arms, lights, and settings, you’ll miss the natural moments that make the bay special.
Kona Snorkel Trips focuses on small-group ocean outings, lifeguard-certified guides, quality snorkeling equipment, and reef-safe practices. The crew can help you understand local conditions and keep your attention on safe movement in the water.
You can review the company’s Kealakekua Bay Captain Cook snorkeling tour before choosing your camera setup. A compact action camera with a wide lens may be enough for casual video. A housed camera with an external strobe suits photographers who want more control.
For another Captain Cook-focused option, you can also review Captain Cook Snorkeling Tours. Compare departure details, equipment information, and the type of experience you want before booking.
Kona Snorkel Trips also offers broader Kona snorkeling tours if you want to compare available ocean excursions. The company provides high-quality gear and guides who can help you manage equipment while keeping safety in view.
When your trip date is flexible, you can check availability before building a larger camera kit. Knowing your departure time helps you plan batteries, clothing, and the amount of equipment you’ll carry.
For the bay’s specific Captain Cook outing, you can also check avaialbility when selecting your date.
A practical lighting routine before you enter the water
Set up your camera on land, where your hands are dry and you can see every control. Check the housing seal, install a charged battery, and confirm that the memory card has enough space.
Test the light before you leave the launch area. Make sure it turns on, changes power levels, and remains attached when you move the camera. If you use a strobe, confirm that the camera triggers it through the fiber-optic cable.
Then choose one simple starting setting. Many photographers lose the first part of a swim because they keep changing everything at once. Adjust only one control after reviewing a test image.
A useful sequence is:
- Take a natural-light photo of the reef.
- Check the water color and the subject’s brightness.
- Add low-power artificial light for a nearby subject.
- Move closer before increasing power.
- Review the edges of the frame for backscatter and dark corners.
Keep the lens port clean. A small water drop can ruin an otherwise sharp photo, and wiping the outside of the housing while floating is difficult. Use a proper lens cloth before entering the water and avoid touching the port during the swim.
If you photograph with a phone, use a reliable waterproof housing rather than relying on a loose pouch. Keep the phone lanyard secured, and remember that touchscreens are harder to operate underwater. A phone light can help with close subjects, but it won’t match the control of a dedicated strobe or video light.
Snorkeling Big Island Hawaii waters rewards patience more than constant shooting. Pause when the water settles, watch how the fish move, and wait for the subject to enter the light. You may take fewer photos, but more of them will have clean composition and natural color.
When you snorkel Big Island reefs, protect your camera from becoming the center of your attention. Keep checking your breathing, position, buddy, and surroundings. Snorkeling Big Island locations is safer and more enjoyable when photography stays connected to good water awareness.
Choosing the right light for your style
If you mainly want photos of your family, a compact camera with natural light may be all you need. Stay shallow, move close, and photograph with the sun behind you.
If you want colorful close-ups of fish and reef, choose an external strobe. Mount it away from the lens, start at low power, and adjust your position before raising the output.
For cinematic clips, use a continuous video light with a wide beam. Keep your movements slow, hold the camera steady, and avoid sweeping the light across the reef.
A large professional system can produce excellent results, but it also requires more practice. For a single Kealakekua Bay snorkeling trip, a smaller setup may give you better photos because you’ll handle it with greater confidence.
The right light should fit your swimming ability, camera, and subject. A reliable compact light in skilled hands usually beats an oversized light that makes you unstable.
Conclusion
The best light for Kealakekua Bay snorkeling photos is usually natural sunlight supported by a carefully positioned external light. Use a strobe for colorful still images, a broad video light for moving footage, and no artificial light when the shallow reef already looks bright and balanced.
Stay close without touching the reef, keep your beam away from wildlife’s eyes, and adjust one camera setting at a time. With a simple setup and calm technique, you’ll capture the bay’s real color without letting your equipment distract you from the water.