
How to Take Underwater Pictures: Tips for Stunning Photos

If you want to take genuinely good pictures underwater, you have to get a few things right first. It all boils down to mastering your buoyancy, getting right up close to your subject, and bringing your own light source, like a strobe or a video light.
These three pillars are the secret to overcoming the biggest hurdles the ocean throws at you. Water just loves to swallow up color and light, which is why so many first-time photos come out looking blurry, hazy, and overwhelmingly blue. Get these basics down, and you're on your way to capturing those vibrant, tack-sharp images you see in magazines.
Your First Dive into Underwater Photography
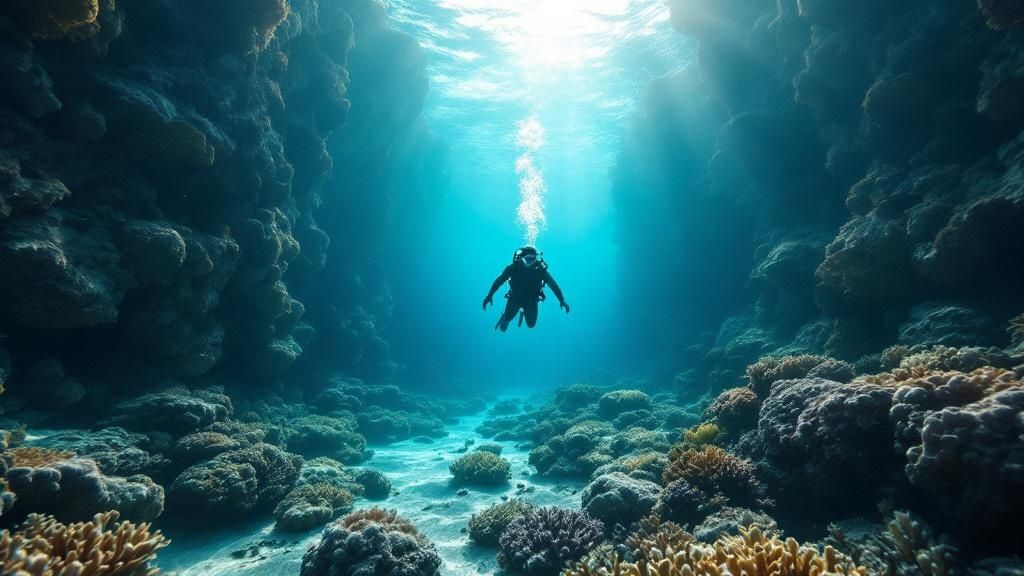
Welcome to the incredible, silent world beneath the waves. Before you even think about capturing that perfect shot of a clownfish, you need to accept one truth: water changes everything you know about photography. It’s a completely different ballgame down there, fundamentally altering light, color, and how you see your subject.
Your first step isn't as a photographer, but as a diver. The real key to learning how to take amazing underwater pictures is to become a confident, stable presence in the water first. That means your buoyancy has to be second nature—it's non-negotiable. An unsteady diver is an unsteady camera platform, and that's a recipe for blurry, poorly-framed shots every single time.
The Unique Challenges of Water
Water is about 800 times denser than air. That density creates two massive problems for any photographer trying to get a good shot:
- Colors Vanish: As you go deeper, water acts like a filter, absorbing the warmer colors of the light spectrum. Reds and oranges are the first to go, often disappearing within the first 15-20 feet. This is the culprit behind all those sad, blue-green photos you see.
- Clarity Drops: The ocean is full of tiny floating particles—plankton, sand, and other bits of debris. These particles scatter light, which kills your contrast and sharpness. Worse, they light up like a snowstorm when hit with your on-camera flash, creating a distracting effect called "backscatter."
To fight back, you have to live by the mantra: "get close, then get closer." By shrinking the distance between your lens and your subject, you're shooting through less water. The result? Sharper images with much richer, more accurate color.
The most impactful change you can make to your underwater photography has nothing to do with your camera. It’s about controlling your position in the water. Perfect buoyancy allows you to get steady, approach wildlife without disturbing it, and frame your shot with precision.
Before you dive in, it helps to have a clear understanding of the foundational principles. I've put together a quick table that summarizes the core pillars of getting started.
Core Principles for Your First Underwater Shoot
| Pillar | Key Action | Why It Matters |
|---|---|---|
| Buoyancy Control | Achieve neutral buoyancy and maintain a stable, horizontal trim in the water. | Prevents stirring up silt, protects marine life, and creates a steady camera platform for sharp photos. |
| Get Close | Minimize the water column between your lens and your subject—aim for 1-4 feet. | Reduces backscatter, increases sharpness, and brings back the vibrant colors that water absorbs. |
| Shoot Up | Get below your subject and angle your camera slightly upwards. | Creates separation from the background, captures beautiful sun rays, and provides a more dynamic composition. |
| Use External Light | Use a strobe or video light positioned away from the camera's axis. | Reintroduces lost colors (especially reds and oranges) and eliminates the harsh shadows and backscatter caused by on-camera flash. |
| Know Your Subject | Observe marine life behavior before you start shooting. | Allows you to anticipate movements, capture natural interactions, and approach animals without causing stress or disturbance. |
Keep these five points in mind every time you get in the water, and you'll see a dramatic improvement in your photos almost immediately.
A Growing Passion and Market
The desire to capture the beauty of the underwater world is stronger than ever. This isn't just a niche hobby anymore; it's a booming field. The global underwater photography market was valued at $4.0 billion and is on track to hit $6.5 billion by 2032.
This growth, explored in more detail in this underwater photography market report, shows just how much accessible tech and a shared love for the ocean have opened the doors for everyone.
What does that mean for you? More resources, better entry-level gear, and a huge, welcoming community of fellow explorers and artists. By focusing on the fundamentals—safety, buoyancy, and light—you'll be well-equipped to add your own perspective to the story of our oceans.
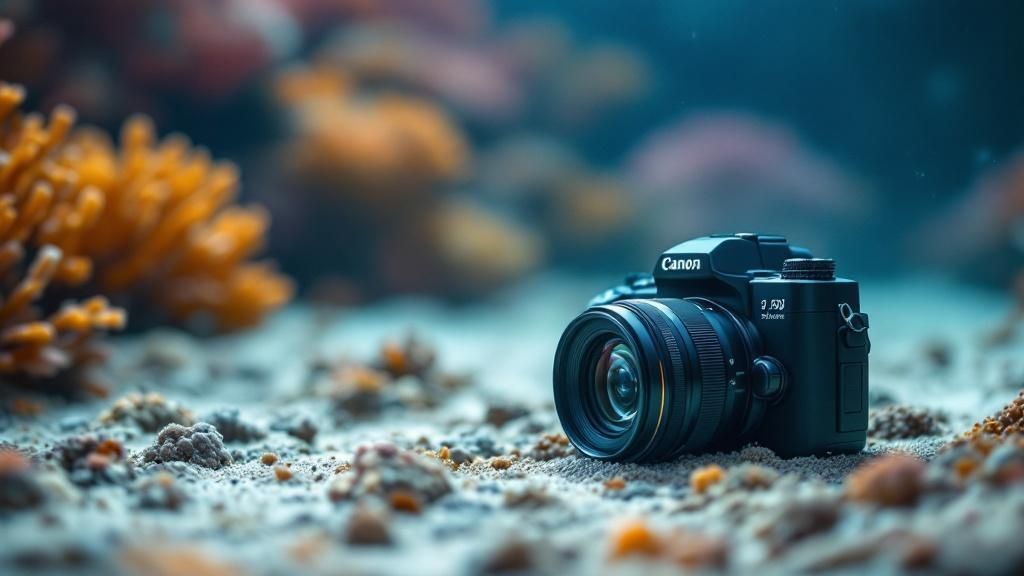
Choosing the Right Underwater Camera Gear
Getting started with underwater photography means making some choices about gear, and honestly, the options can feel a bit overwhelming. From simple cases for your phone to full-blown professional DSLR setups, there's a lot out there. Your decision will steer your budget, how you shoot, and ultimately, the kind of pictures you bring back to the surface. It's worth taking a moment to figure out what's right for you.
The great news is that technology has made it easier than ever to get into this world. The global market for underwater cameras is booming, currently sitting at around $6.75 billion and climbing. This explosion, led by familiar names like Sony, Canon, and GoPro, means more options and better features for everyone, no matter your skill level.
Comparing Underwater Camera Systems
So, where do you start? The camera itself is the first big decision. Each type has its own quirks, benefits, and drawbacks once you take it underwater. There’s no single "best" camera; there’s only the best camera for your goals, your budget, and how you like to dive.
A good compact camera, for instance, is a fantastic entry point, balancing control with portability. An action cam like a GoPro is a workhorse—incredibly tough and perfect for wide-angle video. On the other end of the spectrum, a mirrorless or DSLR rig will give you unparalleled image quality and creative freedom, but it comes with a much higher price tag and a steeper learning curve.
Remember, the best camera is the one you actually have with you and know how to use. Don't feel pressured into buying the most expensive setup right away. Start with something that makes sense for you, and you can always upgrade as your passion for the underwater world grows.
The table below breaks down the most common camera types to help you find your starting point.
Comparing Underwater Camera Systems
| Camera Type | Best For | Pros | Cons |
|---|---|---|---|
| Action Camera (e.g., GoPro) | Beginners, video shooters, and adventure travelers. | Incredibly durable, waterproof out of the box (to certain depths), great for wide-angle shots, and very compact. | Limited manual controls, smaller sensor size affects low-light performance, not ideal for macro photography. |
| Compact Camera | Novice to intermediate photographers wanting more control. | Manual settings, good image quality, zoom capabilities, and relatively small size. | Smaller sensor than larger cameras, can have shutter lag, and may have fewer lens options. |
| Mirrorless Camera | Intermediate to advanced photographers seeking high quality in a smaller package. | Excellent image quality, interchangeable lenses, fast autofocus, and more compact than DSLRs. | More expensive than compacts, and the lens ecosystem can be a significant investment. |
| DSLR Camera | Serious enthusiasts and professionals demanding top performance. | The best image quality, vast selection of lenses, superior low-light performance, and no shutter lag. | Bulky, heavy, and the most expensive option for both camera and housing. |
Each system opens up a different world of possibilities. Your choice here will define your entire setup, from the housing to the lenses you might add later on.
Underwater Housings: Polycarbonate vs. Aluminum
No matter what camera you pick, you need a way to keep it dry. The underwater housing is probably the single most critical piece of equipment you’ll buy—it’s the only thing standing between your expensive electronics and saltwater. Housings generally come in two flavors: polycarbonate and aluminum.
- Polycarbonate Housings: Think of these as tough, clear plastic cases. They're lighter on the wallet and in your luggage, which is great for travel. A huge plus is the clear back, which lets you see the camera's O-ring seal and spot any potential leaks instantly. That offers some serious peace of mind.
- Aluminum Housings: These are the professional standard, machined from a solid block of metal. They’re built like tanks, do a better job of dissipating heat, and the controls often feel more precise. While they are heavier and pricier, their ruggedness is essential for anyone shooting frequently or in demanding conditions.
When you’re looking at housings, think about ergonomics. Can you actually reach the buttons and dials you need, especially if you’re wearing dive gloves? A housing with poorly placed controls will turn a simple settings change into a frustrating ordeal mid-dive.
If you're just dipping your toes in with some snorkeling, you don't need a complex rig. Sometimes the simplest gear is the best. For some practical ideas on what you might need for a casual day in the water, check out our guide on essential gear for snorkeling on the Big Island Hawaii.
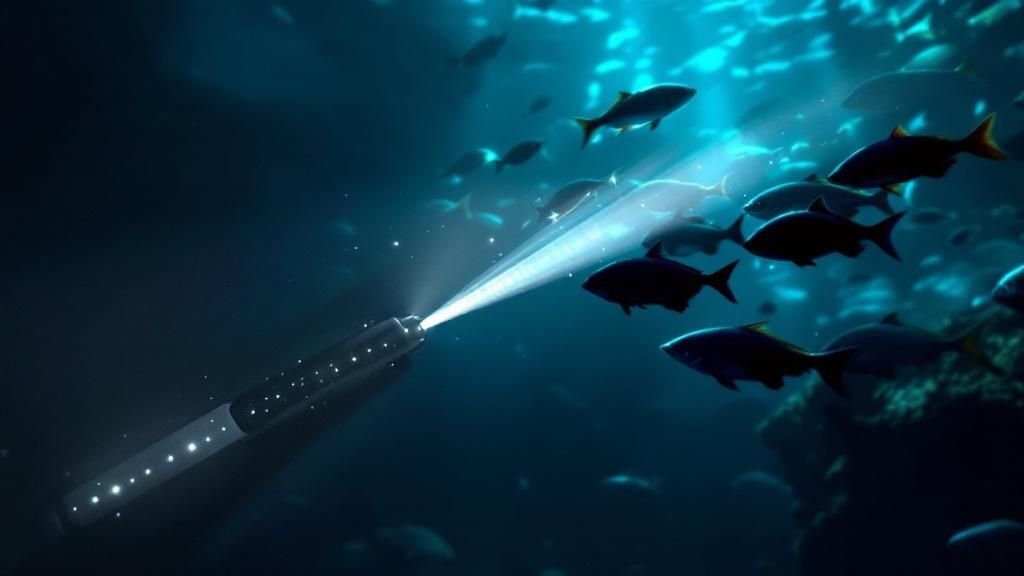
Essential Lighting Accessories: Strobes and Video Lights
If I could recommend just one accessory to completely transform your photos, it would be external lighting. That little pop-up flash on your camera? It's your worst enemy underwater. It lights up all the tiny floating particles between your lens and your subject, creating a snowstorm effect called "backscatter."
To get back all the vibrant reds, oranges, and yellows that water filters out, you have to bring your own light. This is where strobes and video lights are game-changers.
- Strobes (Flashes): For still photography, these are king. They fire a super-fast, powerful burst of light that freezes the action, eliminates motion blur, and makes the true colors of marine life pop.
- Video Lights: These give you a constant, steady beam of light, which is a must for shooting video. You can use them for still photos too—they’re especially helpful for focusing in dark nooks and crannies—but they don't have the same power to freeze a fast-moving fish like a strobe does.
The trick is to get these lights off your camera. By mounting them on flexible arms, you can position them to the side of your subject. This illuminates the reef critter without lighting up the water right in front of your lens, which is the secret to cutting out backscatter and getting clean, crisp shots.
Take a look at this chart. It shows how your camera settings have to change as you go deeper and lose the sun’s natural light.
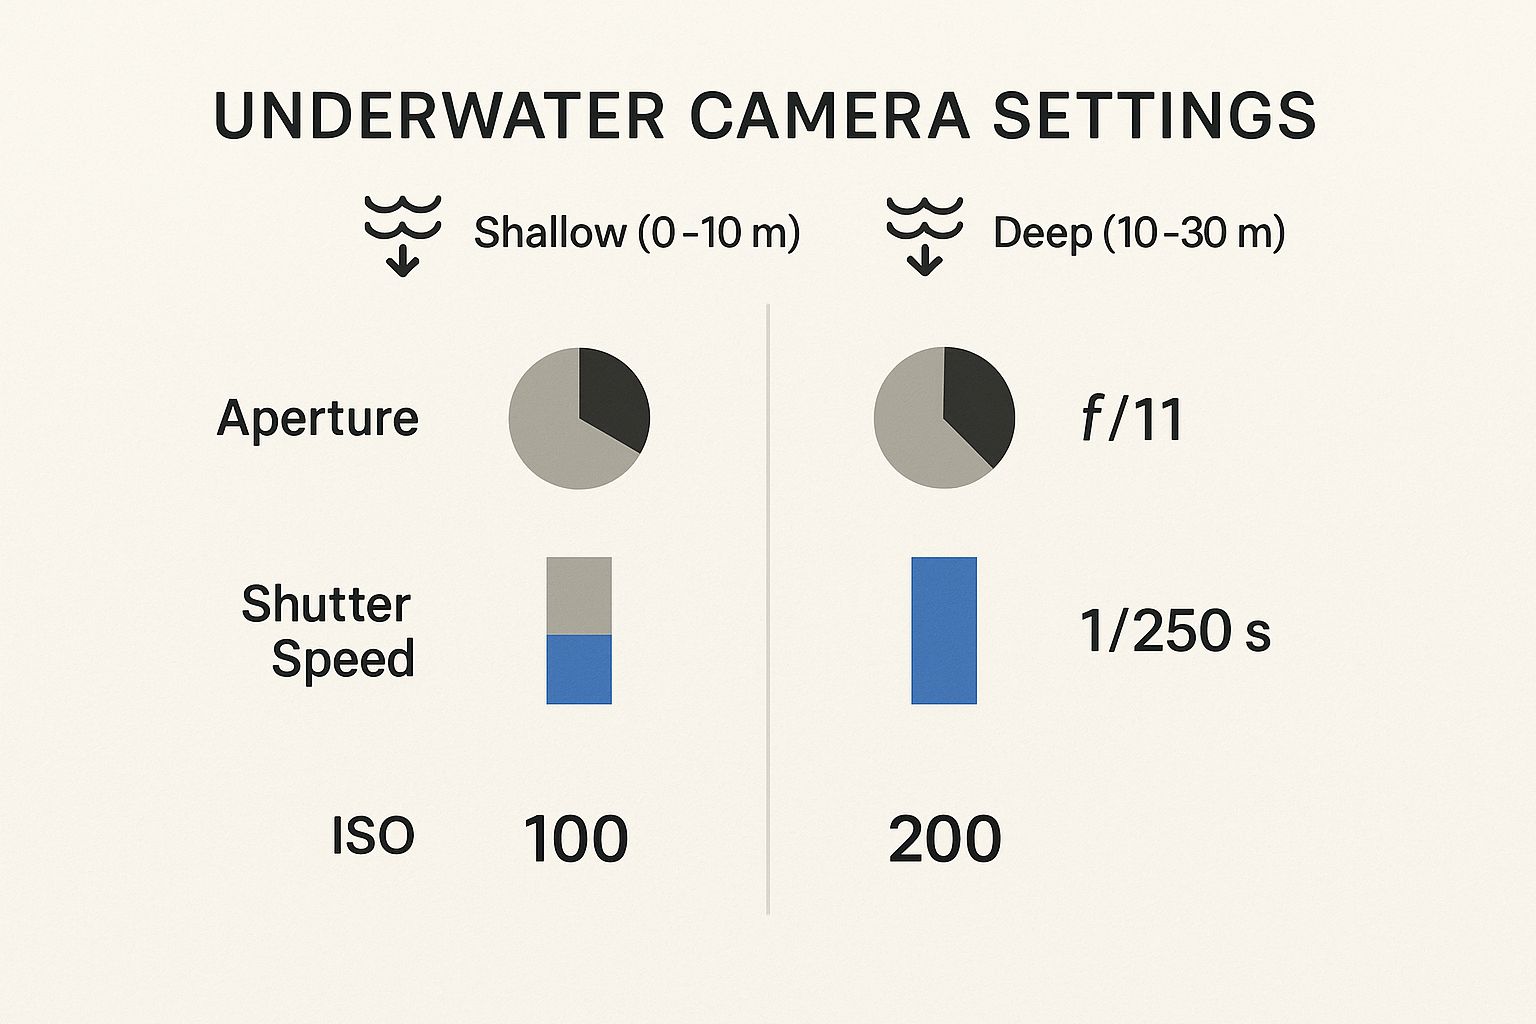
As you can see, the deeper you go, the more you have to rely on your camera’s low-light capabilities and, more importantly, your external lights to create a beautiful image.
Mastering Your Camera Settings Underwater
If you leave your camera on "Auto" mode underwater, you're setting yourself up for a memory card full of disappointment. It's a classic rookie mistake. The strange physics of light and water completely baffle most cameras' automatic sensors, leaving you with images that are flat, hazy, and overwhelmingly blue.
To capture the vibrant, electric world you see with your own eyes, you have to take the wheel. Dialing in your settings manually is the single biggest leap you can make in your underwater photography. It's how you fight back against color loss, control the light, and nail that perfect, tack-sharp focus.
Your Secret Weapon: Shoot in RAW
Before you even think about touching a dial, let's talk about file format. If your camera has a RAW setting, use it. This is absolutely non-negotiable for anyone serious about getting great shots.
Think of a JPEG file as a finished, printed photo. The camera has already made permanent decisions about color, contrast, and sharpness. A RAW file, however, is the digital negative. It holds all the pure, unprocessed data from the sensor, giving you incredible power to make changes later in programs like Adobe Lightroom. This is your lifeline for correcting the unavoidable color problems that water creates.
RAW is your get-out-of-jail-free card. It lets you properly fix your white balance, pull stunning detail out of shadows and highlights, and fine-tune colors in ways that are simply impossible with a pre-baked JPEG.
Winning the War Against Blue and Green
Water acts like a massive blue or green filter, stealing away all the warm colors—reds, oranges, and yellows—the deeper you go. Your first mission is to tell your camera what "white" actually looks like at your current depth. You've got a couple of tools for this job.
- Custom White Balance: This is your most precise weapon. All you do is point your camera at something neutral white or grey at your current depth—a dive slate, a friend's white fin, or even a patch of sand—and use your camera's function to set a custom white balance. This tells the camera, "Hey, this is white down here," and it will adjust all the other colors accordingly. Just remember, you'll need to do this again anytime you change depth by more than a few feet.
- Red Filters: For action cams or compacts in bright, shallow water, a physical red or magenta filter is a great, simple alternative. It's literally a piece of colored plastic that clips over your lens. The filter physically adds red light back into the scene, which helps cancel out the blue or green tint from the water. It's a fantastic "set it and forget it" tool, but it's less accurate than a custom white balance and loses its magic in deeper water where strobes become essential.
Unlocking the Exposure Triangle
"Exposure triangle" is just a fancy term for the three settings that work together to control how bright your picture is: aperture, shutter speed, and ISO. Getting a feel for how they interact is the true art of photography, both above and below the surface.
Shutter Speed: Freezing the Action
Shutter speed is all about time—how long your camera's sensor sees the light. More importantly for us divers, it's about controlling motion. A fast shutter speed freezes a fast-moving fish in its tracks, while a slow one will turn it into a blurry streak.
For a skittish butterflyfish or a cruising sea turtle, you need to be quick. A good starting point is 1/125s for slower critters and 1/250s or faster for anything darting around. The game changes if you're using strobes (external flashes), though. Their burst of light is so incredibly fast that it will freeze the action for you, giving you more freedom with your shutter speed.
Aperture: Controlling Sharpness and Light
Aperture refers to the opening in your lens, measured in f-stops (like f/2.8, f/8, f/11). It's a bit counterintuitive: a small f-number means a wide opening, which lets in lots of light but creates a very shallow depth of field (where only a thin slice of your scene is sharp). A large f-number means a tiny opening, letting in less light but keeping much more of the image in focus.
- For wide-angle reef scenes, you want everything sharp from the coral in the foreground to the diver in the background. An aperture of f/8 to f/11 is usually the sweet spot.
- For macro shots of tiny subjects like a shrimp or nudibranch, you might push it even further to something like f/16 to ensure the entire critter is perfectly sharp.
ISO: Your Last Resort for Light
ISO is your camera's sensitivity to light. Low ISOs, like 100 or 200, give you clean, crisp, high-quality images. High ISOs, like 1600 or 3200, make the sensor more sensitive for dark environments, but they come at a cost: digital "noise," which looks like ugly graininess in your photo.
Your mantra should be: keep ISO as low as possible. Always. If an image is too dark, first try opening your aperture (lower f-stop) or slowing your shutter speed. Only crank up the ISO as a last resort, like on a really deep or overcast dive.
Luckily, many of the world's most spectacular reefs are in bright, shallow water. For instance, a place like the famous Captain Cook snorkeling tour in Hawaii is often flooded with sunlight, making it easy to keep that ISO nice and low for the best possible image quality.
Underwater Shooting Techniques That Work
Having the right camera and dialing in the perfect settings gets you in the game. But what you do in the water is what separates a forgettable snapshot from a jaw-dropping photograph. Your technique is the final, crucial piece of the puzzle.
This is where we move past the tech specs and into the art of it all. Success now boils down to how you move, what you see, and how you frame your shot in a weightless, ever-changing world.
Live by the Golden Rule of Proximity
If you take only one thing away from this guide, let it be this: get close, then get closer. This is the undisputed golden rule of underwater photography, and for good reason—it solves three of our biggest headaches at once.
Every inch of water between your lens and your subject acts like a thief. It steals color, robs you of sharpness, and fills your frame with hazy backscatter. By closing that distance, ideally to just a few feet, you’re shooting through the least amount of water possible.
This single adjustment will radically improve your photos. Colors pop, details become crisp, and your strobes can light up your subject without illuminating a snowstorm of particles in front of it.
Adapting Composition for a 3D World
The classic rules of photography absolutely apply underwater, but they need a little twist for a world where your subject can be above, below, or right next to you.
- Rule of Thirds: Picture that tic-tac-toe grid on your screen. Don't just place your subject on a line; aim for the intersections. Putting a turtle’s eye on one of those points creates a much more engaging image than just sticking it in the center.
- Leading Lines: Keep an eye out for natural lines that can guide the viewer's eye. It could be the edge of a coral reef, a ray of sunlight piercing the blue, or the elegant curve of a giant kelp stalk.
- Negative Space: Don't be afraid of the big blue! Using the vast, empty ocean as a compositional tool is incredibly powerful. Framing a small subject against a wide expanse of water creates a profound sense of scale and isolation.
One of the most effective tricks in the book is to change your perspective. Most beginners shoot down at their subjects. Try to get below your subject and shoot at a slight upward angle. This trick separates the animal from the busy reef, often framing it against the beautiful blue water or the sunlit surface.
Capture Silhouettes and Sunbursts
Shooting towards the surface opens up a whole new world of creative shots. By positioning yourself underneath a subject—think sea turtle, manta ray, or even another diver—you can expose for the bright water behind them. This instantly turns your subject into a dramatic, powerful silhouette.
This technique is especially awesome in the late morning or early afternoon when the sun is high. If you angle your camera just right, you can capture stunning sunbursts or sun rays filtering through the water, adding a truly magical feel to the shot.
Ethical Interaction with Marine Life
The last, and most important, technique is simply patience. We are guests in their home. The best wildlife photographers I know are incredible observers who take the time to learn an animal's behavior before even thinking about raising their camera.
Never, ever chase, touch, or harass a marine animal for a picture. Not only does it stress the creature, but you'll end up with photos of a frantic, panicked animal. Instead, find your spot, get your buoyancy just right, and just wait. Let the marine life get used to you.
More often than not, curious fish will come to check you out. These are the moments that create the most authentic and rewarding images. Being a calm, respectful presence in the water will get you closer to wildlife than chasing ever will. This mindset is vital, especially when you’re lucky enough to encounter majestic animals. We’ve covered some best practices for these special moments in our guide on snorkeling with manta rays. Remember, your best shots will come from respect, not pursuit.
Bringing Your Photos to Life in Post-Processing
Your job isn't over when you break the surface and peel off your wetsuit. In many ways, it’s just begun. This is where you get to reclaim all the vibrant colors and sharp details that the water so effectively stole from your camera.
Think of post-processing as the underwater photographer's darkroom. It’s not about "fixing" a bad photo; it's a fundamental part of the craft. Water physics strips away light and color, and editing is simply how we bring it back. It’s how you transform that flat, blue-ish image on your screen into the spectacular scene you actually witnessed.
Whether you're using Adobe Lightroom or another favorite, the whole process hinges on one crucial decision you made back in the water: shooting in RAW. That file format holds all the raw data from the sensor, which gives you the latitude you need for the heavy lifting ahead.
Restoring Color and Banishing the Blue
First things first: we need to tackle the color. Water is basically a giant blue or green filter, and our primary job is to fight back. If you took the time to set a custom white balance underwater, you're already ahead of the game. But even then, some fine-tuning is almost always necessary.
Your go-to tools here are the White Balance sliders.
- Temp Slider: Slide this toward the yellow/warm side. This is your main weapon against the overwhelming blue.
- Tint Slider: If the water had a more greenish hue, slide this a touch toward magenta to neutralize it.
The trick is to find a natural look. I always hunt for something in the frame that should be neutral—like white sand, the bubbles from a regulator, or the underbelly of a fish. Tweak the sliders until that spot looks truly white or gray. Get that right, and you'll be amazed as all the other colors snap back into place. Suddenly, the reds and oranges pop just like you remember them.
The dehaze slider is your secret weapon. In programs like Lightroom, this one tool works wonders to cut through the haze and restore the contrast lost to water particles. Be gentle, though. A little goes a very long way, and it’s easy to overdo it.
Refining Contrast and Exposure
Once your colors are looking good, it's time to make your subject the star of the show. This is all about guiding the viewer's eye by adjusting the brightness and contrast.
I usually start with the main Exposure slider to get the overall brightness where it needs to be. Then, I dive into the Highlights and Shadows. For example, pulling down the highlights can bring back incredible detail in the sunlit water near the surface, while lifting the shadows can reveal the rich texture on a dark piece of coral you thought was lost.
Finally, set your Blacks and Whites. These sliders define the true black and white points in your image, which is the key to creating that punchy, professional contrast. A great photo should have a full tonal range, from inky blacks to bright whites.
Removing Backscatter and Final Touches
Ah, backscatter. Even with perfect strobe placement, you’ll inevitably find those distracting little snowflakes caused by lit-up particles floating in the water.
Thankfully, they’re easy to zap. The Spot Healing Brush (or a similar clone tool) is your best friend. Just click on each speck, and the software will intelligently replace it with the color and texture from the surrounding area. It can feel tedious on a particularly "snowy" photo, but cleaning up just a few of the most obvious spots makes a world of difference.
Careful editing is especially critical for night dives where particles are everywhere. For a truly unique experience, a Manta Ray Night Snorkeling tour produces mind-blowing encounters that really come alive with good post-processing.
Your final steps are sharpening and noise reduction. I like to apply sharpening selectively to my main subject to make it crisp, and only use noise reduction if I had to crank the ISO in dark water. Do this, and your photos will finally match the breathtaking reality you experienced.
The demand for high-quality underwater imagery is exploding, with the global market for underwater cameras projected to hit USD 18.81 billion by 2030. This growth shows just how vital these tools have become for both art and science. You can dive deeper into these trends in this insightful report on the underwater camera market.
Your Underwater Photography Questions, Answered
As you get ready to dive in, it’s completely normal to have a few questions rattling around in your head. Learning how to take pictures underwater is a journey of trial and error, but knowing the answers to a few common problems can really shorten that learning curve and give you a huge confidence boost.
I’ve seen a lot of new photographers run into the same hurdles. Let's tackle some of the most frequent ones so you can get better results on your very next dive.
Can I Actually Get Good Pictures with a GoPro?
You absolutely can. Modern action cameras like the GoPro are fantastic tools for getting your feet wet, literally. They’re especially brilliant if you love capturing those big, expansive reef scenes with that signature wide-angle look. They’re tough, tiny, and more powerful than you might think.
To really make your GoPro sing, a couple of key accessories make a world of difference. A simple red filter is a game-changer for bringing back natural-looking colors in bright, shallow water, say from 5 to 20 feet deep. If you’re going deeper or shooting on a darker day, an external video light will make your subjects pop. You won't get the same fine-tuned control as a big camera rig, but you can still capture phenomenal shots by getting super close to your subject and shooting in great light.
How Do I Stop My Photos From Being So Blurry?
Ah, the blurry photo—the bane of every photographer's existence. Underwater, it's usually caused by one of three things: camera shake, a moving subject, or the camera focusing on the wrong thing. The water just makes all three more likely to happen.
Your best weapon here is shutter speed. A faster shutter instantly freezes motion.
- For still life like coral or a resting fish, I’d aim for at least 1/125s.
- For moving critters like a swimming turtle or a school of fish, you’ll want to push that to 1/250s or even faster.
Using external strobes is another game-changer. That powerful, split-second burst of light is incredibly effective at freezing action. And don't forget the fundamentals—always double-check that your camera has locked focus on your subject’s eye, not the blue water drifting behind it.
Your most powerful tool against blur isn't in your camera settings—it's your fins. Mastering your neutral buoyancy creates a rock-steady camera platform. A stable diver can hold the camera perfectly still, even with slower shutter speeds, which leads directly to sharper images.
What Is Backscatter and How Do I Get Rid of It?
You know those distracting, snow-like specks of light that can ruin an otherwise perfect shot? That’s backscatter. It happens when your flash or strobe lights up all the tiny particles—plankton, sediment, you name it—floating in the water between your lens and your subject.
The single most effective way to beat it is to move your light source off the camera. By placing external strobes on arms and positioning them out to the sides, you light your subject from an angle. This clever trick leaves the water directly in front of your lens in shadow, making the backscatter practically invisible.
If you’re stuck using your camera's built-in flash, your only real defense is to get as close as you possibly can to your subject. The goal is to minimize the amount of water (and all those floating specks) that the flash has to travel through.
Do I Really Need to Shoot in RAW?
If you want the absolute best image quality and the most freedom to edit your photos later, the answer is a resounding yes.
Think of a JPEG as a finished cake; the camera has already baked in all the color, contrast, and white balance. You can't change the ingredients after the fact. A RAW file, however, is like having all the raw ingredients. It’s the digital equivalent of a film negative, containing all the pure, unprocessed data from the camera's sensor.
This gives you total control in post-processing to:
- Perfectly correct the white balance to remove any blue or green color cast.
- Rescue details from bright highlights or dark shadows that looked lost.
- Fine-tune every color to make them vibrant and true-to-life.
These are the adjustments that turn a good underwater photo into a great one. If you have more questions about planning your adventure, you might find what you're looking for in our guide covering frequently asked questions about Kona snorkel tours.